Posted on 6/22/2024, 10:06:19 AM
Modified on 1/27/2026, 10:58:12 AM
Reading time 10min.
## Introduction to the Video Game “Minesweeper”
Game Principles
“Minesweeper” is a logical puzzle that features an interactive grid of cells, some of which contain mines. When a cell is clicked, it is uncovered. A cell can be:
- Closed – this is the state of every cell at the start of the game;
- Numbered – showing a digit from 1 to 8, where the digit indicates how many mines are adjacent to this cell;
- Empty – there are no mines around it;
- Flagged – it will no longer be opened with a left‑mouse click.
The number on a cell tells how many mines are present in the surrounding cells. The player must uncover all cells that are not mines, or flag every mine. If a mine is uncovered, the game ends.
Minesweeper usually offers three difficulty levels:
- Easy – 8 × 8 board with 10 mines;
- Medium – 16 × 16 board with 40 mines;
- Hard – 30 × 16 board with 99 mines.
The difficulty levels differ only in board size and the number of mines.
History of Minesweeper
The exact origin of the game mechanics is unknown, but the version we know appeared in the Microsoft Entertainment Pack released in 1992. It was created as a tool for teaching mouse manipulation in a fun way and was developed by Robert Donner and Curt Johnson.
Choosing a Development Base
You can either build the game from scratch or use a game engine. A game engine supplies a huge amount of ready‑made functionality, while a hand‑crafted solution offers far greater freedom. I decided to use an engine because it dramatically simplifies the task and makes adding extra features easier.
Among the engines considered were Godot, Unity, Unreal Engine, and Cocos. Unity and Unreal were discarded immediately due to their heavy system requirements. Cocos works with TypeScript, which is unsuitable because the project targets C++. Therefore I chose Godot Engine not only for its low system demands but also because it is open‑source and has a large developer community.
Consequently the game will be written using GDExtension. However, a fully debugged prototype will be created first, then ported to C++.
WRITING THE VIDEO GAME
Programming a Working Prototype
We start with a prototype that implements the core algorithms of the full game. For the prototype I chose Python. Below are the main steps.
-
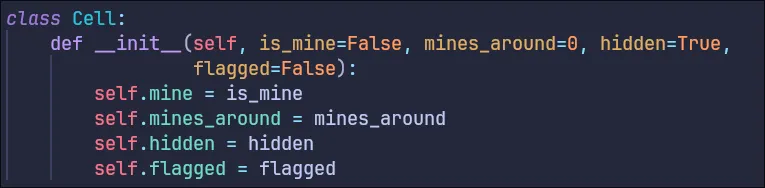
Cell class – declared first (Figure 1). It represents a single cell and stores all properties needed for its behaviour on the board.
-
Declared a one‑dimensional array called field and initialized it with a
forloop using the two variables width and height. -
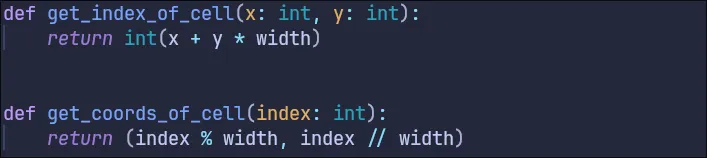
Wrote a function that converts x, y coordinates into an array index and a reverse function (Figure 2).
-
Implemented a function that prepares the playing field. It uses Python’s
randommodule to pick a cell, then updates the values of all surrounding cells and the chosen cell itself (the algorithm is simpler for debugging) – see Figure 3.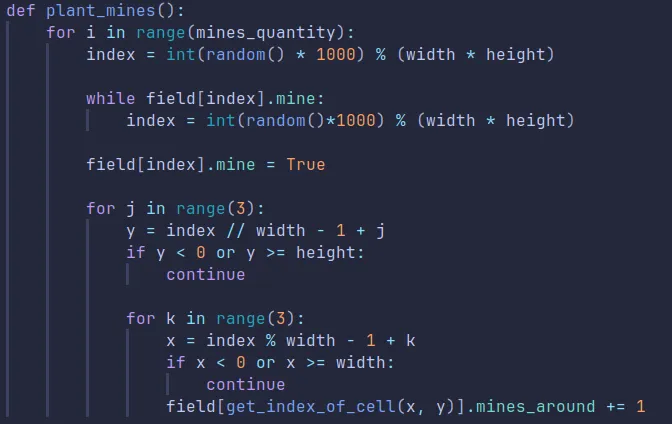
-
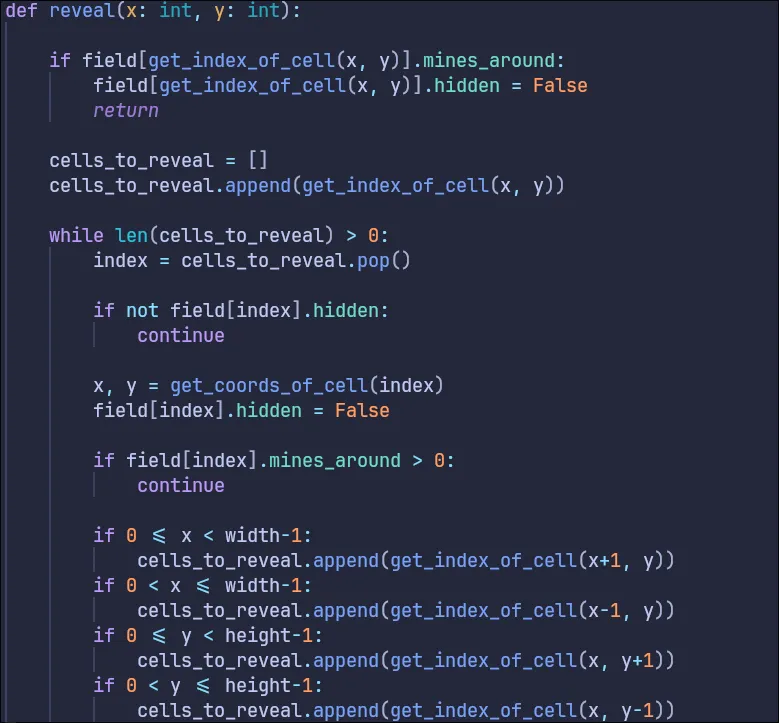
Opening a cell – the most important and complex function. In Minesweeper, if the opened cell has a surrounding‑mine count of 0, all contiguous empty cells and their neighbours must also be opened. A straightforward flood‑fill algorithm for this is shown in Figure 4.
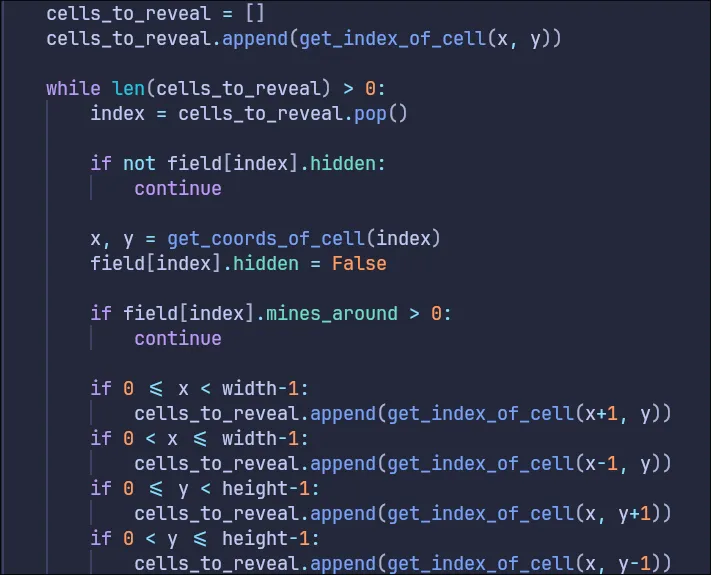
The algorithm checks whether the list of cells to process is empty, then adds every neighbour. If a neighbour has a number, it is opened and removed from the list; otherwise it is opened and also removed.
-
Implemented the simpler case of opening a cell that has a mine in its neighbourhood (Figure 5).

-
The complete function is shown in Figure 6.
-
Added win/lose checks. The full source code is available at:
https://gist.github.com/Foxelyss/b76a759bd6f4f0e6f0f6f8b092641219 🔗.
Building the Game Core
Porting to GDExtension and C++
First, we turn the Cell class into a plain struct (it will contain only data, no methods). All prototype functions, except console output, will live in a Field class. Godot already provides random‑number utilities, so we replace random with RandomNumberGenerator and use its randi_range method instead of the modulo operator.
The cell‑opening method, which previously accepted coordinates, is rewritten to accept an index into the cell array. Additional set and several get methods are added to expose Field properties, plus methods for clearing the board and generating a new puzzle.
Node Selection for Gameplay
- GridContainer – will hold the board;
- Button – will represent each cell.
A helper class FieldGrid will manage board creation, win/loss detection, and time keeping. It acts as a façade over the Field class and stores references to the Field, the “retry” button, and the “main‑menu” button.
The final scene hierarchy is shown in Figure 7.
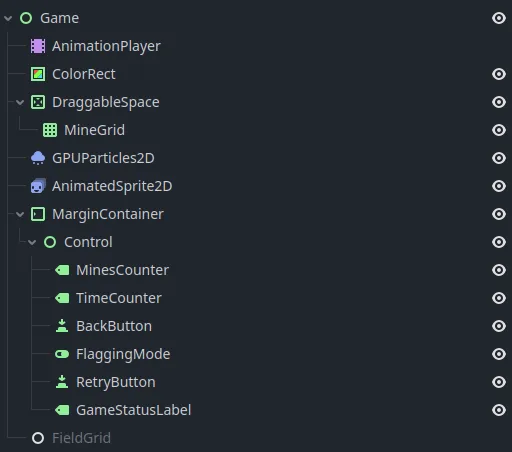
Figure 7 – Final scene structure
After choosing the components, we implement a renderer. FieldGrid will be responsible for creating the board, updating its visual state, and measuring round time.
Creating Cell Textures
We design a texture for every possible cell state using Inkscape. All textures are placed on a single sheet, starting with an empty cell on a purple background, then blue‑backgrounded cells numbered 1‑9, flag and mine icons, and finally the “covered” cell texture (Figure 8).

Figure 8 – Cell textures
We repeat the same set with a different colour scheme (Figure 9).

Figure 9 – Alternate colour set
The purple tone is used for opened empty cells so they stand out without drawing too much attention.
In FieldGrid, we add a routine that loads the textures, a routine that creates the appropriate number of Button nodes, and an update_grid method that refreshes the board visualisation.
We also connect FieldGrid to the gui_input signal: it receives information about which button was clicked and with which mouse button, then either opens the cell or flags it.
Main Menu Implementation
The main‑menu scene re‑uses the same background as the game itself. It consists of difficulty‑selection buttons and containers that define their position and size (Figure 10).
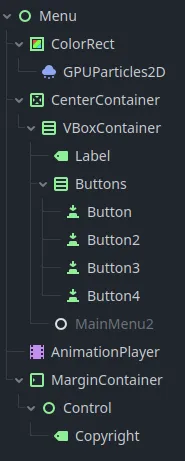
Figure 10 – Main‑menu scene
The menu code reads which button is pressed and loads the appropriate game scene. Text displayed in UI elements is not hard‑coded; instead it is read from a CSV file named translations.csv, allowing localisation without code changes.
Gathering Feedback
Testing the first iteration (Figure 11) revealed a one‑second slowdown on the hard difficulty and occasional crashes when placing a flag at the beginning of a game. The project also lacked background music and menu styling – items that will be fixed in the second iteration.
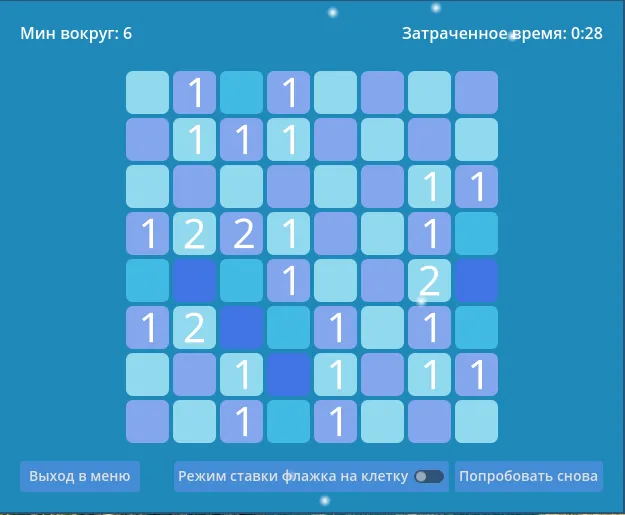
Figure 11 – First iteration of Minesweeper
Improving the Game
Optimisation
Two scenes were merged into a single combined scene, simplifying code, unifying responsibilities, and enabling smoother transitions between menus and gameplay.
Performance‑related fixes include replacing a full dynamic‑array clear (Figures 13 & 14) with a manual element‑by‑element reset (Figure 12), which is faster than invoking system memory‑free calls and then recreating the array.
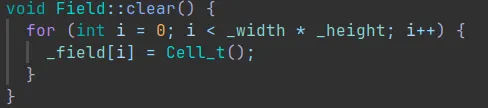
Figure 12 – Optimised clear method
![]()
Figure 13 – Non‑optimised code segment
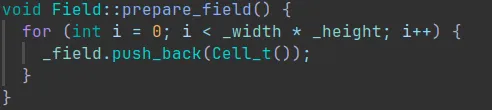
Figure 14 – Method called after the non‑optimised segment
Unifying Controls
The first iteration’s control scheme was confusing for casual players. Controls were simplified and adapted for a single‑button (or touch‑screen) interface: holding the left mouse button (or touch) and moving quickly triggers board scrolling, which helps when the board does not fit on the screen. Previously this function was bound to the mouse‑wheel middle button, an unintuitive choice for users unfamiliar with professional 3D or engineering software. Moreover, scrolling was allowed even when the whole board already fit on screen, which was illogical and considered a bug.
Adding a Leaderboard Screen
Methods for loading and saving statistics in JSON format were implemented. Each difficulty level has an array of integers representing elapsed seconds.
- Figure 16 – Method that creates the initial statistics file.
- Figure 17 – Method that writes a new record to the file.
- Figure 18 – Method that displays the leaderboard screen.

Figure 16 – Create statistics file
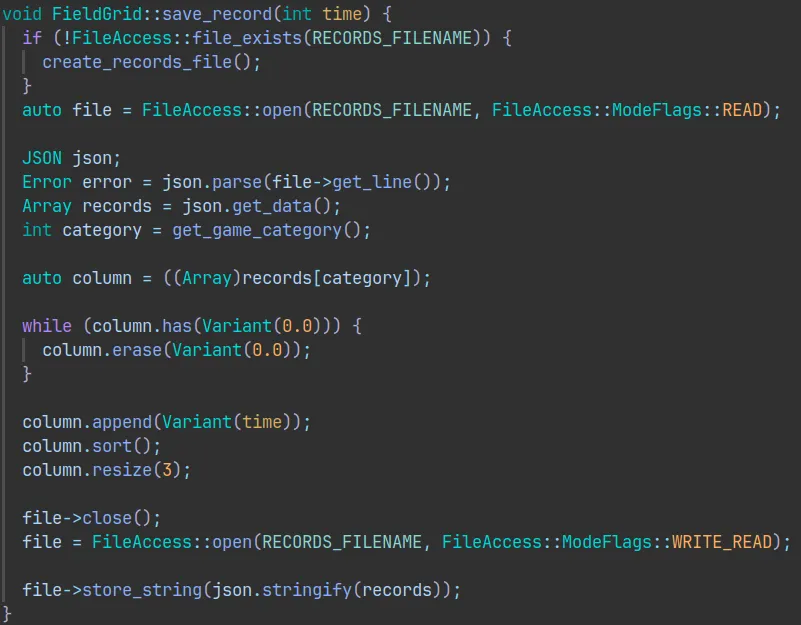
Figure 17 – Write a record
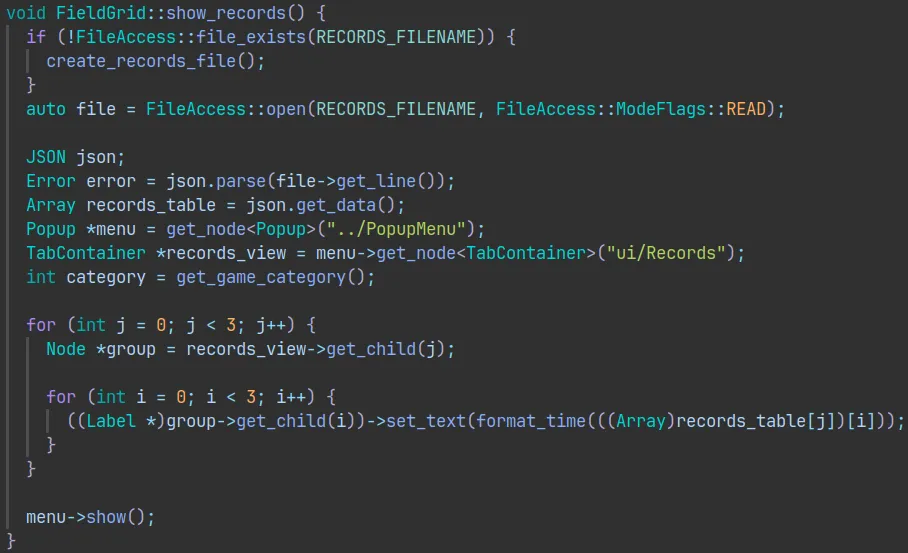
Figure 18 – Show leaderboard
The leaderboard UI uses a Popup node (Figure 19) because it is specifically designed for overlay menus. Inside the popup a TabContainer organizes three tabs – one for each difficulty (Figure 20).
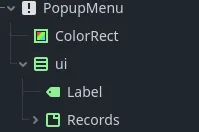
Figure 19 – Popup node
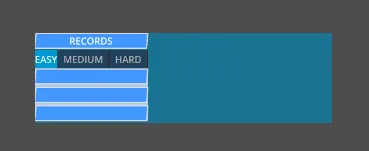
Figure 20 – Leaderboard in Godot editor
Styling
A minimalistic style was chosen: simple geometric shapes with bright colours. Text fields use a blue background and a slanted (parallelepiped) edge as shown in Figure 21. The font is IBM Plex Sans.

Figure 21 – New UI styles
Creating the Final Scene
The final scene was modelled in Blender: floating 3D models of some game elements, with a simple moving ornament in the background (Figure 22) created in Aseprite.
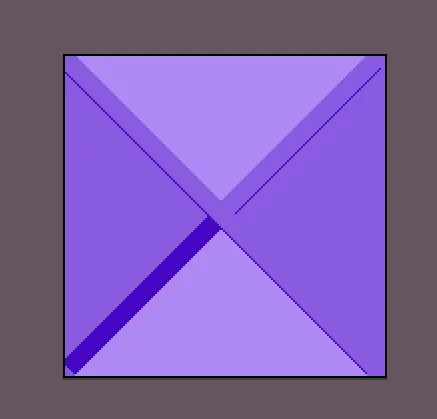
Figure 22 – Moving ornament
Animation of the ornament and the 3D objects is handled by AnimationPlayer.
Animating Gameplay
A “loss” animation shakes the UI. Opening a cell now plays a “balloon‑pop‑like” animation (Figure 23), also made in Inkscape.

Figure 23 – Cell pop animation
Raising Difficulty
In the first iteration the easiest board contained the most mines, which felt unbalanced. The number of mines on the two hardest difficulty levels was therefore increased.
Adding Sound
Sound effects were generated with jsfxr. Music was sourced from the internet – specifically “Googie – Imaginary Numbers (REMIX)” by Rolobi.
An AudioStreamPlayer node plays background music; it is linked to AnimationPlayer so that playing animations can trigger or control audio volume, mixing, etc. A second AudioStreamPlayer, also tied to AnimationPlayer, handles cell‑opening, loss, and win sounds.
Minor Tweaks
Initially the timer displayed raw seconds, causing the number of digits to change (1 digit → 2 digits) and look unsightly. A formatting routine was added (Figure 24).

Figure 24 – Time‑formatting method
All the small and large adjustments culminated in a release version of Minesweeper, whose source code is hosted on GitHub:
https://github.com/Foxelyss/minesweeper 🔗
Figure 25 shows the final gameplay.
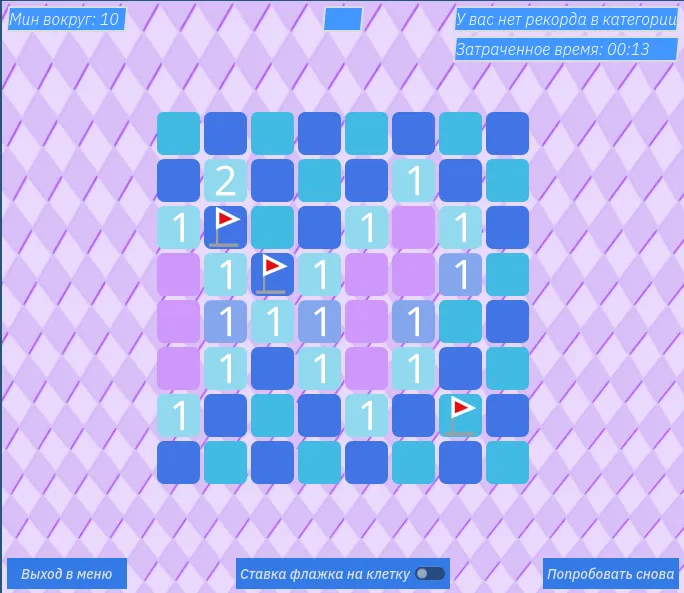
Figure 25 – Final game screenshot
RECOMMENDATIONS FOR CREATING A VIDEO GAME
Steps to follow when developing a video game:
- If it’s your first game, start with a replica of something simple and popular.
- Document the core gameplay in detail – the main mechanics must be fun and interesting. Write down every detail so you don’t have to guess later.
- Build a prototype with the essential functionality and, if possible, let other people test it. This gives you direction for improvements and shows what works and what doesn’t.
- Iterate and test again. Real‑player testing is crucial not only for bug hunting but also for gathering valuable feedback. Remember: people will play the game, not just you!
- If the first release is just practice, make sure subsequent releases reach an audience. Build a community by sharing gameplay clips, dev‑logs, trailers, screenshots, and set realistic expectations.
CONCLUSION
The project resulted in a fully‑fledged Minesweeper video game written in C++ using the Godot Engine. Development exposed many challenges, especially memory‑access issues. As the code grew more complex and inter‑dependent, forward‑planning became essential to keep it maintainable. Numerous bugs were identified and fixed, and the internal development process was examined. The hypothesis that game development is a simple task proved false – it is a complex endeavour involving visual, audio, and gameplay dimensions. All of this experience was distilled into a set of guidelines for video‑game development.
LIST OF REFERENCES
- How an Intern Student Created the Most Popular Video Game in the World, or the History of Windows Games. — Text: electronic // Jimmy Maher : [website]. URL: https://habr.com/ru/articles/428091/ 🔗 (accessed 30.01.2024).
- Cocos Creator. — Text: electronic // Cocos : [website]. URL: https://docs.cocos.com/creator/manual/en/getting-started/helloworld/ 🔗 (accessed 30.01.2024).
- Godot Docs. — Text: electronic // Juan Linietsky, Ariel Manzur and the Godot community : [website]. URL: https://docs.godotengine.org/en/stable/ 🔗 (accessed 30.01.2024).
- Godot Recipes. — Text: electronic // KidsCanCode : [website]. URL: https://kidscancode.org/godot_recipes/4.x/ 🔗 (accessed 30.01.2024).
- Minesweeper (video game). — Text: electronic // Wikipedia : [website]. URL: https://en.wikipedia.org/wiki/Minesweeper_(video_game) 🔗 (accessed 30.01.2024).
- Unity Manual. — Text: electronic // Unity Technologies : [website]. URL: https://docs.unity3d.com/Manual/index.html 🔗 (accessed 30.01.2024).
- Unreal Engine 5.3 Documentation. — Text: electronic // Epic Games Inc. : [website]. URL: https://docs.unrealengine.com/5.3/en-US/ 🔗 (accessed 30.01.2024).